
How to Read a Cross Stitch Pattern (Step by Step)
Symbols, grids, keys and backstitch lines explained simply, with a free practice chart so you can learn how to read a cross stitch pattern tonight.
In this post
The first time I opened a “real” pattern as a grown-up, it looked like a page of tiny hieroglyphs. Then it clicked, and it has never been confusing since. If you want to learn how to read a cross stitch pattern, the whole thing comes down to one idea and a handful of conventions. Let’s go through them together.
The short answer: a cross stitch pattern is a grid where each square is one cross stitch. The symbol or color in a square tells you which floss to use, and the key (or legend) matches each symbol to a DMC floss number and the number of strands. Lines show backstitch, dots show French knots, and arrows on the edges point to the center, where you usually start.
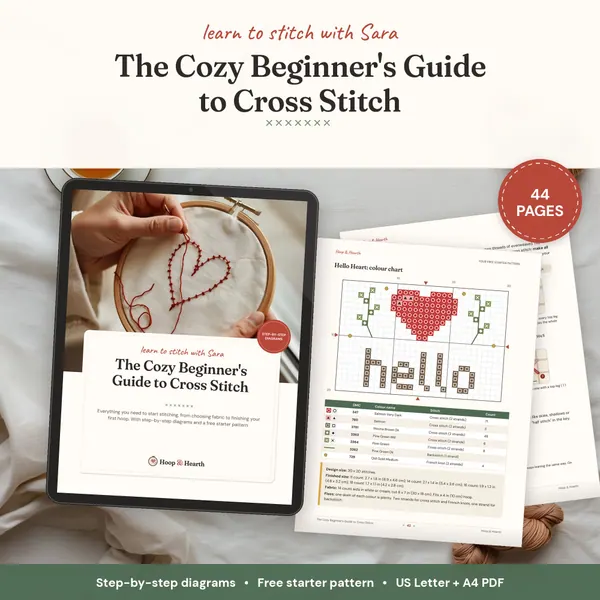
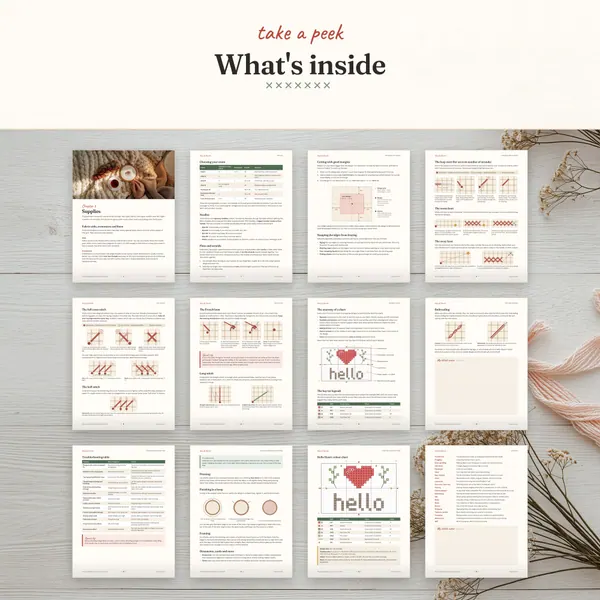
This guide is part of my complete beginner’s guide to cross stitch. Keep a pattern open next to you as you read. It helps.
The parts of a chart: grid, symbols, key, arrows
Almost every pattern, from a tiny ornament to a huge sampler, has the same parts.
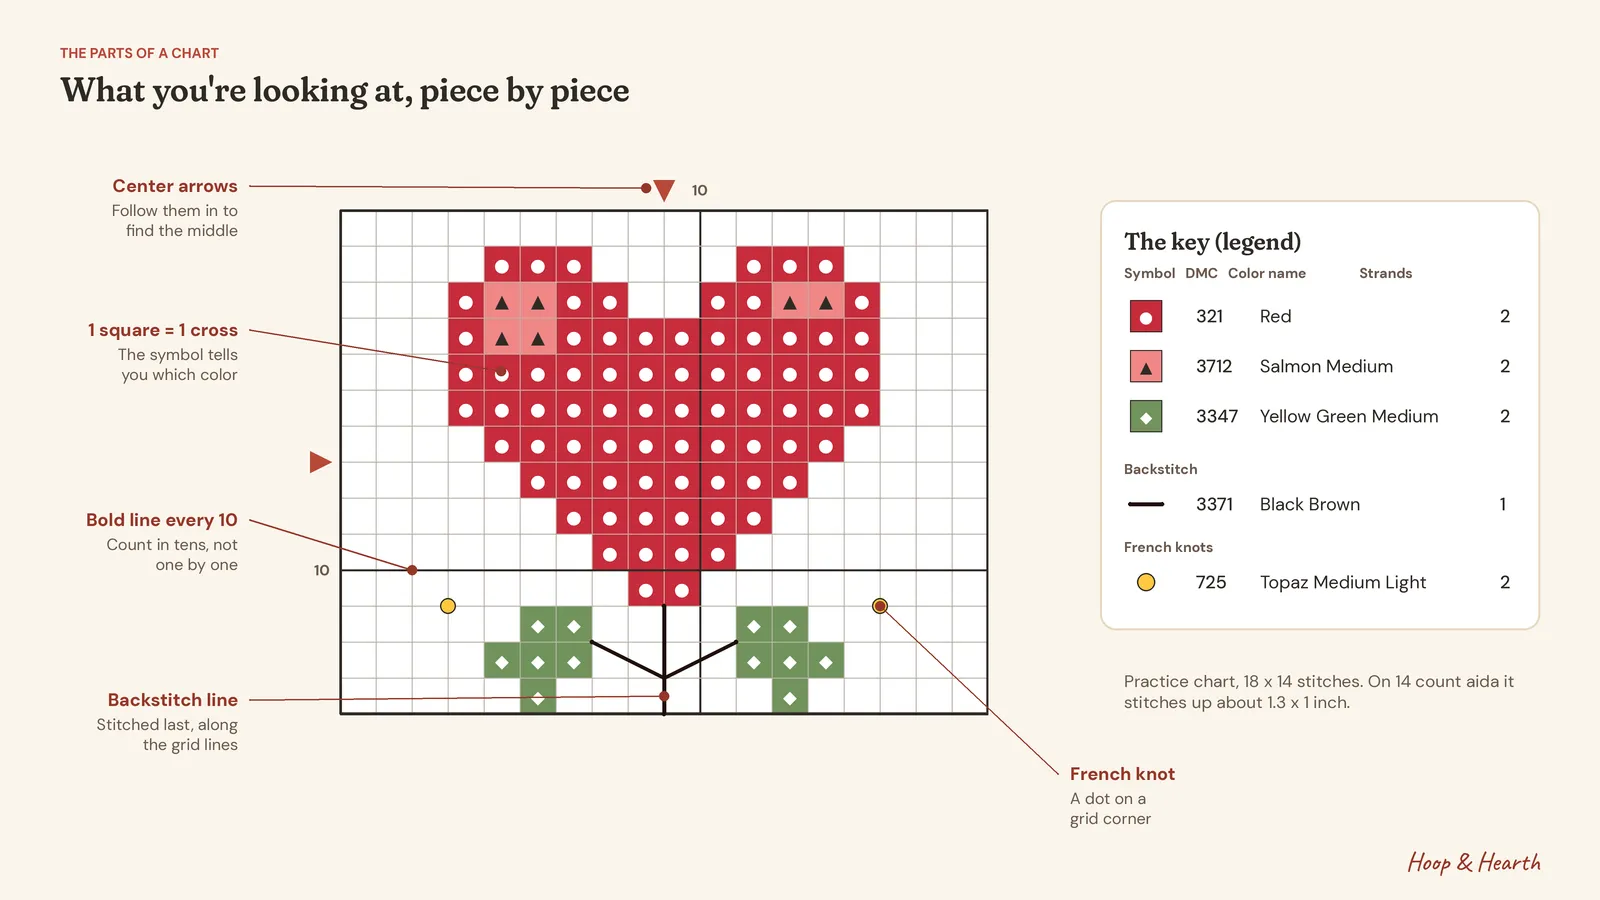
- The grid. Every square is one stitch. Thin lines separate the squares, and a bold line every 10 squares helps you count.
- Symbols (and colors). Each color of floss gets its own symbol. In a color chart, the square is also filled with a color that looks like the floss.
- The key. A table that matches each symbol to a DMC number, a color name and how many strands to use. Good keys also say how many skeins you need.
- Center arrows. Small arrows or triangles on the top and side edges. Follow them in and they meet at the middle of the design.
- Numbers along the edges. Usually every 10 squares, so you can find row 40 without counting from the top.
- Lines and dots. Lines are backstitch. Dots on the grid lines are French knots.
What each square means (one square = one cross)
This is the big one. A square on the chart is not a hole in the fabric. It’s the little block of aida between four holes, and you stitch an X over it.
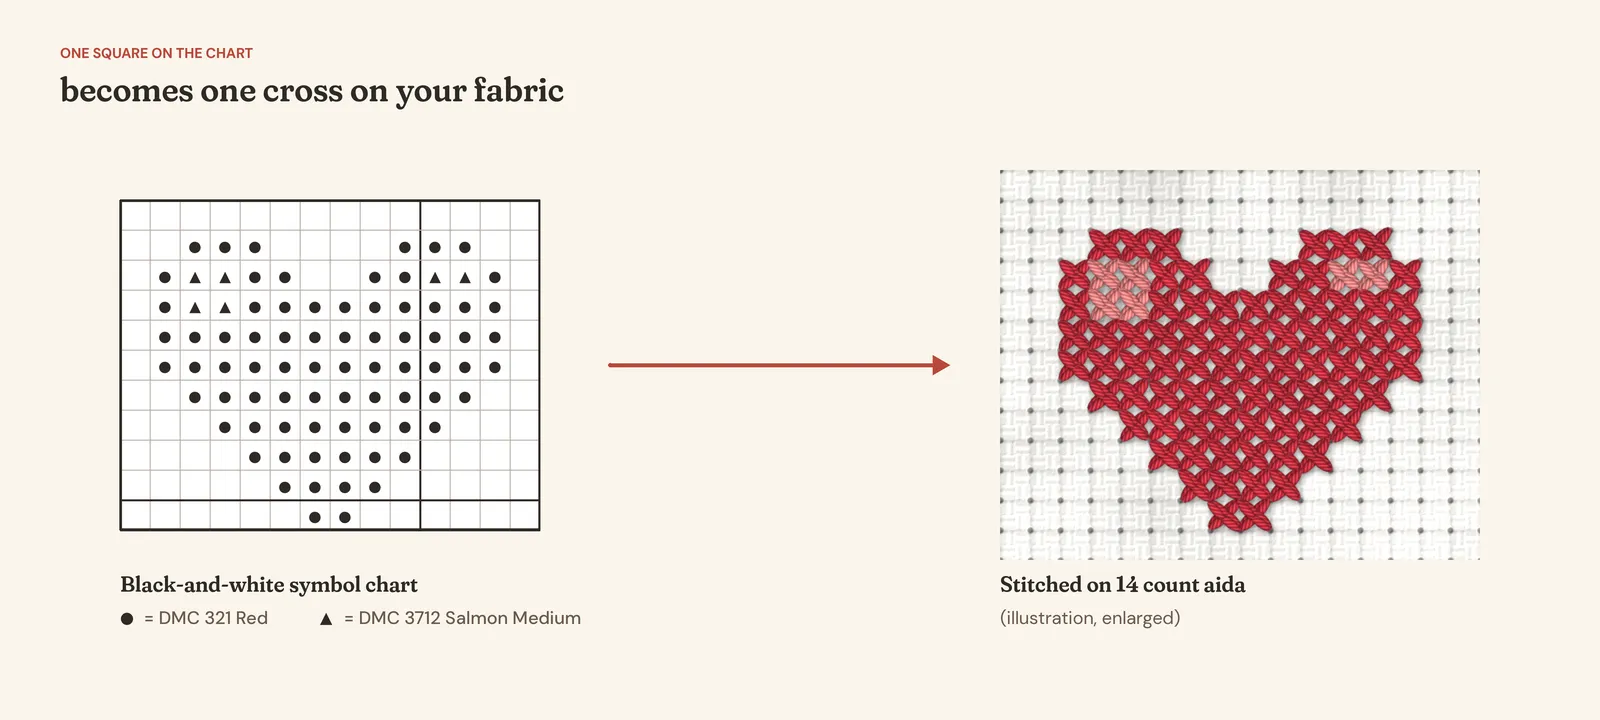
So if a chart row shows five squares with a ● symbol, you make five full crosses side by side in that color. If a square is empty, you leave the fabric bare.
That also means chart size is stitch count. A design that’s 42 squares wide is 42 stitches wide. Divide by your fabric count to get inches: 42 stitches on 14 count aida is 3 inches. My fabric count guide has a full size table.
Symbols that only fill part of a square
Sometimes a symbol sits in just one corner or half of a square, often as a little triangle. That usually means a fractional stitch: a quarter stitch (one short leg from a corner to the center) or a three-quarter stitch (a quarter stitch plus a full half leg). They’re used to smooth curves. Every designer shows them a little differently, so check the pattern notes.
My patterns are full stitches only, which keeps them calm to stitch. That’s a deliberate choice for evening stitching.
Reading the floss key (DMC numbers, strands, skeins)
The key is where the chart turns into a shopping list. A typical line reads something like this:
| Symbol | DMC | Name | Strands | Skeins |
|---|---|---|---|---|
| ● | 321 | Red | 2 | 1 |
| ▲ | 3712 | Salmon Medium | 2 | 1 |
| ◆ | 3347 | Yellow Green Medium | 2 | 1 |
What each column tells you:
- Symbol: what to look for on the grid.
- DMC number: the exact floss color. This is the number to buy.
- Name: a friendly name. Handy, but the number is what counts.
- Strands: how many of the six strands to stitch with. On 14 count it’s usually 2 for cross stitch and 1 for backstitch. If the key doesn’t say, see my strands by fabric count chart.
- Skeins: how many skeins to buy. For small designs it’s almost always one.
Backstitch and French knots usually have their own section in the key, with their own strand counts. Read those separately. A common beginner slip is stitching backstitch with two strands because that’s what the cross stitches use.
Before I start any pattern, I pull out every floss on the key, check the numbers against the label, and wind them onto bobbins with the symbol written next to the number. Ten minutes of sorting saves a lot of squinting later.
a little gift for you
Get my free beginner pattern
A clear, full-stitch chart with big symbols and a full-color key, perfect for practising everything in this post. Free when you join The Hearth Letter.
We send about two letters a month. Unsubscribe with one click.
Finding the center and where to start
Most stitchers start in the middle, and I’d recommend it for your first few projects.
- On the chart: follow the arrows in from the top and side edges. Where the two imaginary lines cross is the center. Some charts mark it with a cross or a shaded square.
- On the fabric: fold it in half one way, then the other. The point where the folds meet is the center. Mark it with a pin or a few basting stitches.
- Find the nearest stitch. The exact center often lands between squares, or on an empty square. Count from the center to the nearest symbol and start there.
Starting in the center means your design ends up evenly placed, with the margins you planned for framing. If you start in a corner, one miscount can leave you with a lopsided margin, or running off the fabric.
Once you’re comfortable, some people prefer to start at the top-left and work down in rows. That’s fine too, as long as you measure where that corner should sit first.
Color charts vs black-and-white symbol charts
Most PDF patterns, mine included, come in a few versions.
- Color chart (with symbols): the squares are filled with floss-like colors and a symbol. It’s easy to see the picture, and lovely for spotting where a color sits.
- Black-and-white symbol chart: symbols only, on a white grid. It prints cheaply and clearly, and it’s often easier when two colors are similar, like two greens or two blues.
- Large print: fewer squares per page, so each square is bigger. Brilliant for tired eyes.
Use whichever you like, and switch between them. I often stitch from the black-and-white chart and peek at the color one when I’m unsure what part of the picture I’m in.
Backstitch lines and French knot dots
Backstitch is shown as solid lines drawn on top of the grid. Most of the time they run along the edges of the squares, from hole to hole. Diagonal lines go across a square from corner to corner. Longer lines can cover several squares in one stitch, as long as the stitch isn’t so long that it snags.
Backstitch is nearly always stitched after the cross stitches, because it sits on top of them.
French knots are shown as small dots, usually sitting on a grid intersection (a hole in the fabric) rather than in the middle of a square. The key gives them their own color and strand count.
Both are easier than they look. My guide to backstitch and French knots shows how to do them step by step.
Multi-page charts: overlap rows and the index page
Bigger designs won’t fit on one page, so the chart is split across several. Two things make this painless:
- The index page (or page map) shows the whole design divided into numbered pages, so you can see how they fit together.
- Overlap rows. Good charts repeat a few rows and columns from the neighbouring page, usually shaded or outside a dashed border. They help you line pages up. Don’t stitch the overlap twice.
The numbers along the edges continue from page to page. If page 1 ends at column 60, page 2 starts at column 61 (with a few shaded overlap columns before it). If a chart doesn’t overlap or number its pages, it’s much easier to make a mistake, so it’s worth looking for that before you buy.
Some people tape pages together into one big chart. I prefer to work one page at a time with a clip to keep it flat.
Counting without losing your place
Counting is the only “hard” part of cross stitch, and a few habits make it nearly foolproof.
- Count in tens. Use the bold lines. “Two tens and three” is much easier than counting 23 squares one by one.
- Stitch from something you’ve already stitched. Count from a finished stitch to the next one, not from the edge of the chart.
- Mark off as you go. A highlighter or pencil on a printed chart, or the mark-off tool in an app.
- Check before you fill. On a big block of color, stitch the outline first, then count it against the chart before filling in.
If you do miscount (everybody does), my guide to fixing cross stitch mistakes shows how to unpick neatly.
Practice chart: stitch this tiny heart
The labelled chart near the top of this post is a real, stitchable practice chart. It’s 18 x 14 stitches, so it comes out about 1.3 x 1 inch on 14 count aida, and it uses everything in this guide:
- Find the center with the arrows. On the fabric, fold to find the middle.
- Stitch the red heart (DMC 321, ●) with two strands, starting at the center.
- Add the two little highlight blocks (DMC 3712, ▲). Notice they’re blocks of four, not scattered single stitches.
- Stitch the green leaves (DMC 3347, ◆).
- Backstitch the stem with one strand of DMC 3371, along the grid lines.
- Finish with two French knots in DMC 725, on the grid corners.
It’s a lovely thing to stitch on a scrap, and it fits a 3 inch hoop. If you’d like a full beginner pattern with a printable chart, my free beginner pattern is the next step.
Reading charts on a tablet
PDF patterns open on a phone or tablet too, and an app like Pattern Keeper (for Android and iPad) lets you highlight one color, mark off stitches as you go and keep your place automatically. It needs a PDF made in a compatible way, which is why “Pattern Keeper friendly” matters on a listing. My Pattern Keeper guide walks through importing a chart step by step.
One thing to know: apps are brilliant for cross stitches, but always keep the backstitch and French knot instructions from the PDF key handy too.
Patterns that are easy to read
Every Hoop & Hearth chart has a bold line every 10 squares, center arrows, numbered edges, a color chart, a black-and-white chart, a large-print chart and a Pattern Keeper friendly PDF. You can read more about how I make my charts.
Ready to stitch? Go back to the beginner’s guide for the stitching steps, browse the beginner-friendly patterns, or grab a freebie from the free patterns page.
a little gift for you
Get your free cross stitch patterns
Join The Hearth Letter and download every freebie instantly, plus 15% off your first order and cozy stitching tips from Sara.
We send about two letters a month. Unsubscribe with one click.
Frequently asked questions
Where do you start on a cross stitch pattern?
Most stitchers start in the center. Follow the arrows on the edges of the chart in to the middle square, fold your fabric in half both ways to find its center, and make your first stitch there. That keeps the design centered on the fabric.
What does one square on a cross stitch chart mean?
One square on the chart is one full cross stitch on your fabric. The symbol or color inside the square tells you which floss to use. An empty square means no stitch.
What does a circle or dot mean on a cross stitch pattern?
Symbols mean whatever the key says, so always check the key first. A filled symbol inside a square is a color of floss. A small dot sitting on the grid lines, between squares, is usually a French knot.
What do half symbols or triangles in a square mean?
A symbol that fills only part of a square, often a small triangle in one corner, is usually a fractional stitch: a quarter or three-quarter stitch. The pattern's notes or key will explain how that designer shows them.
Should I use the color chart or the black and white chart?
Use whichever you find easier to read. Color charts make it easy to see the picture. Black and white symbol charts are often clearer when two colors are similar, and they cost less ink to print.
Patterns to try
Stitch along with this post
Keep reading
More from the blog
How to Cross Stitch for Beginners: A Cozy, Complete Guide
Learn to cross stitch step by step: supplies, reading a chart, your first stitch, and neat finishing. A friendly guide with a free beginner pattern.
Cross Stitch Glossary: WIP, FFO, SAL, Frogging & More
What do WIP, FO, FFO, SAL, HAED, PK, frogging and confetti mean? A friendly A-Z cross stitch glossary of terms and abbreviations for new stitchers.
How to Fix Cross Stitch Mistakes (Frogging Made Easy)
Miscounted? Wrong color? How to unpick cross stitch safely, fix tension and messy backs, and stop thread tangling, without damaging your fabric.